Audio is disabled by default on Windows Server 2008. This guide walks you through enabling it via Services and Remote Desktop Session Host Configuration.
By default, audio is disabled on Windows Server 2008 to allow the server to run more efficiently when used via Remote Desktop. Follow the steps below to enable it.
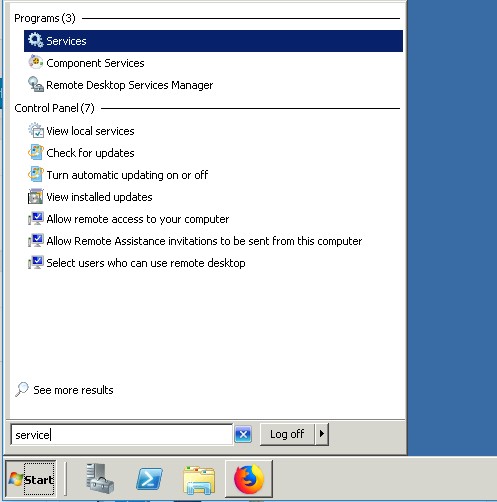
Step 1: Open Services
Click Start, type services, and open the Services application.
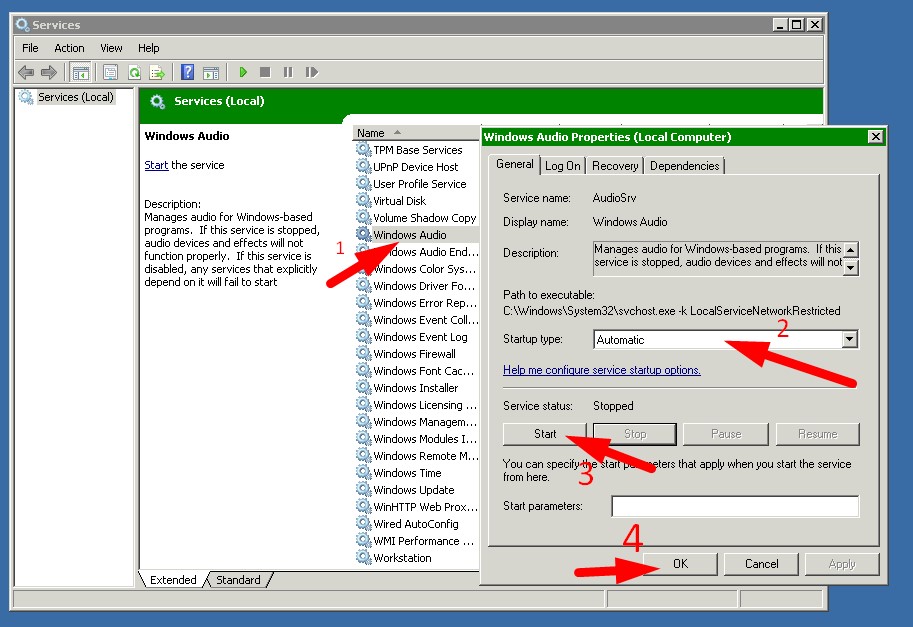
Step 2: Enable Windows Audio
Locate Windows Audio in the list and double-click it. Set the startup type to Automatic, click Start, then click OK.
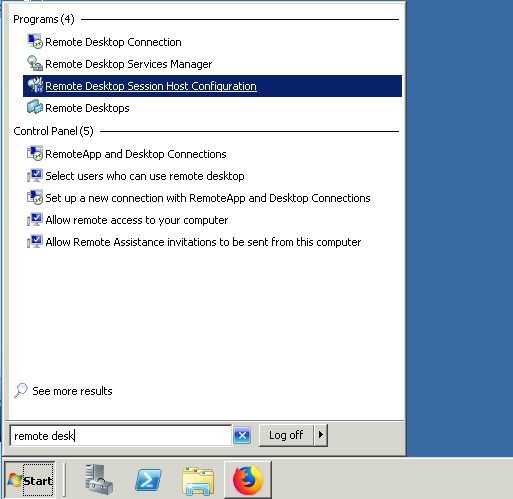
Step 3: Open Remote Desktop Session Host Configuration
Close the Services window. Click Start and search for remote desktop session host configuration.
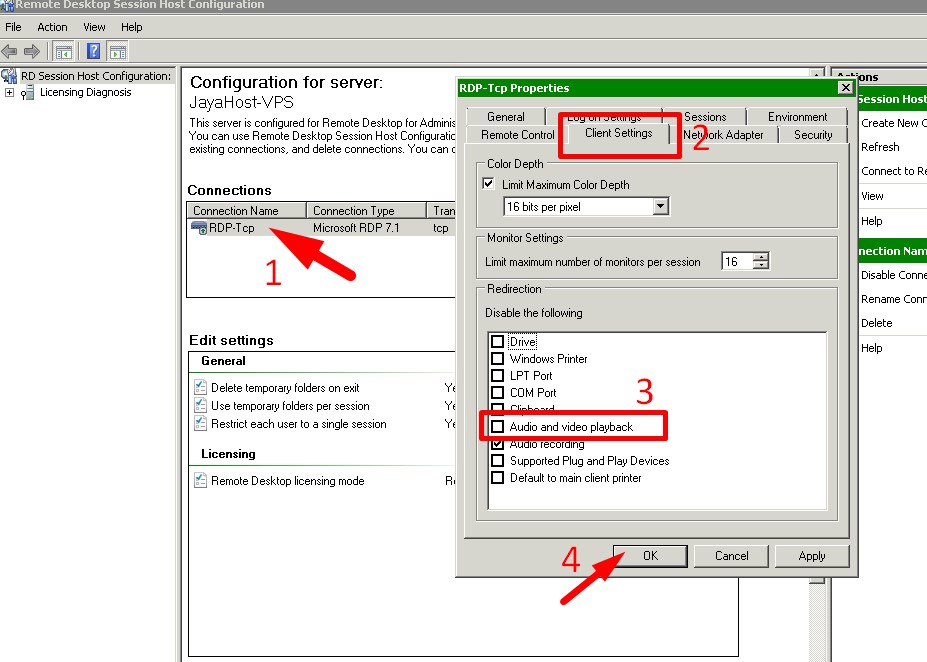
Step 4: Modify RDP-Tcp Settings
Double-click RDP-Tcp, go to the Client Settings tab, and uncheck audio and video playback. Click OK.
Step 5: Reconnect via Remote Desktop
Restart your Remote Desktop connection. Audio should now be active.
If Audio Is Still Not Working
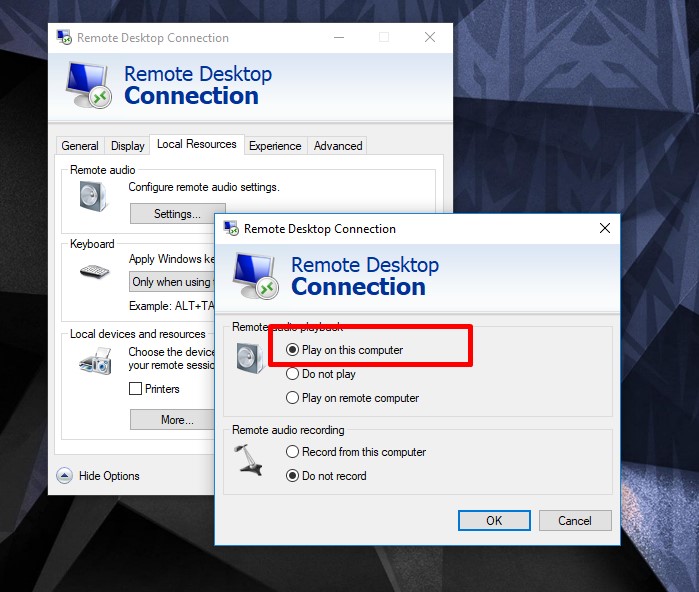
Enable audio from within your Remote Desktop client:
- Click the Local Resources tab
- Under Remote Audio, click Settings
- Select Play on this computer
If you still experience issues, please contact Digitalku support for assistance.