SSL is automatically activated on Digitalku hosting once your domain points correctly. If not, this guide shows how to manually enable it using AutoSSL in cPanel.
SSL is now essential — browsers like Chrome label websites without it as "Not Secure." Digitalku provides free SSL that should activate automatically once your domain is correctly pointed to your hosting.
However, automatic activation can sometimes fail. Here's how to activate it manually.
Steps
1. Log In to cPanel
Log in to your hosting cPanel. See the how to log in to cPanel guide if needed.
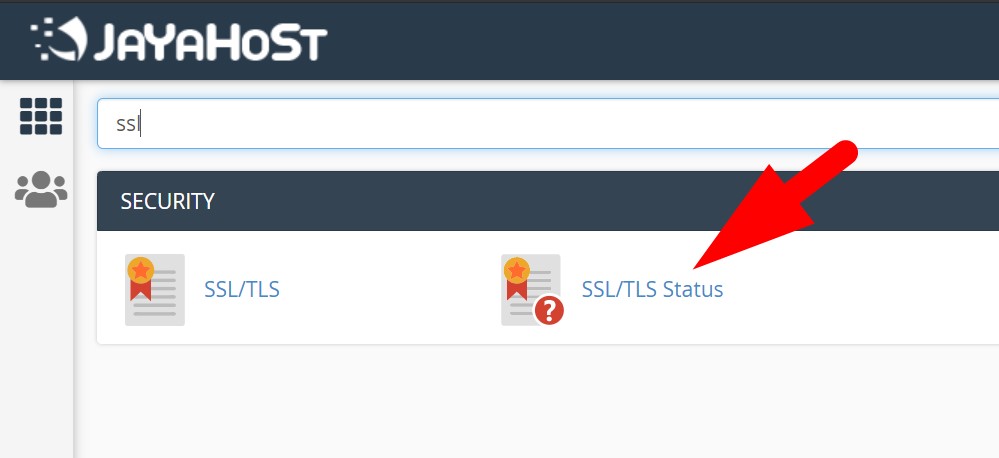
2. Open SSL Status
Find and click SSL Status in cPanel.
3. Check Your SSL Status
Review the SSL status of your domain. If there's an issue, red text will appear explaining the cause. Click View Certificate for more details.
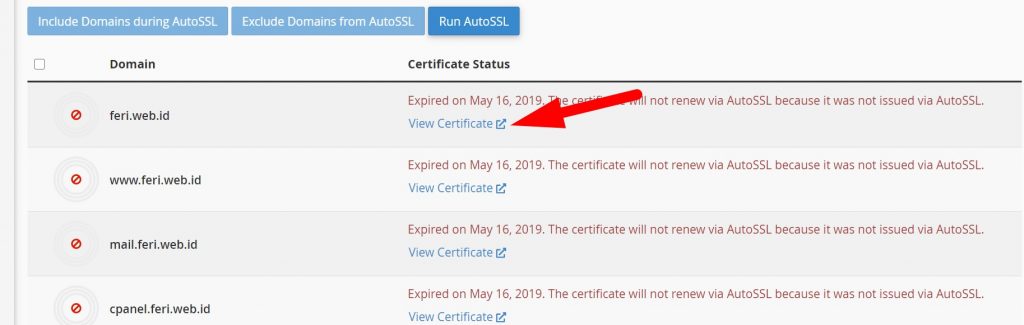
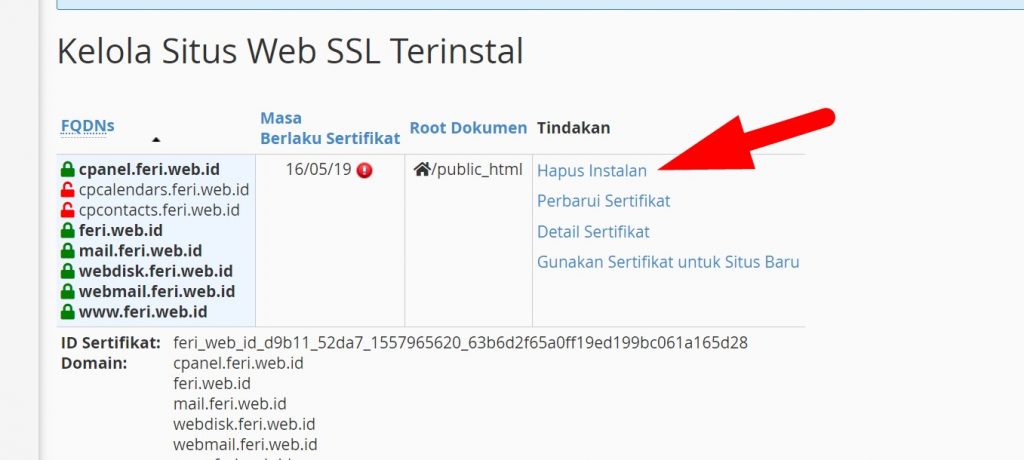
If an old or broken certificate needs to be replaced, click Remove Installation to remove it first.
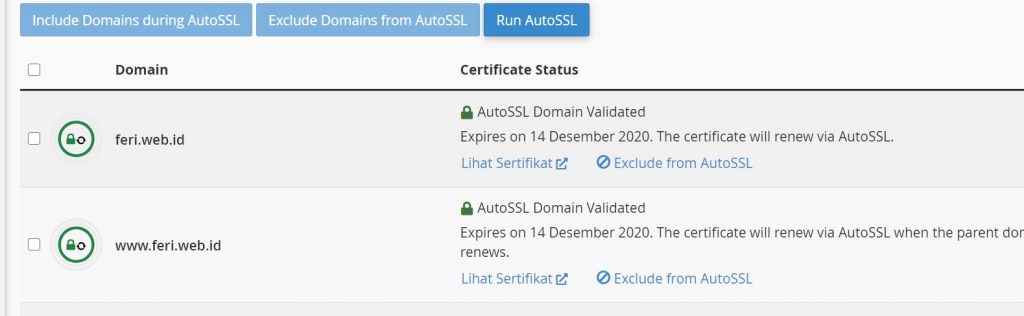
4. Run AutoSSL
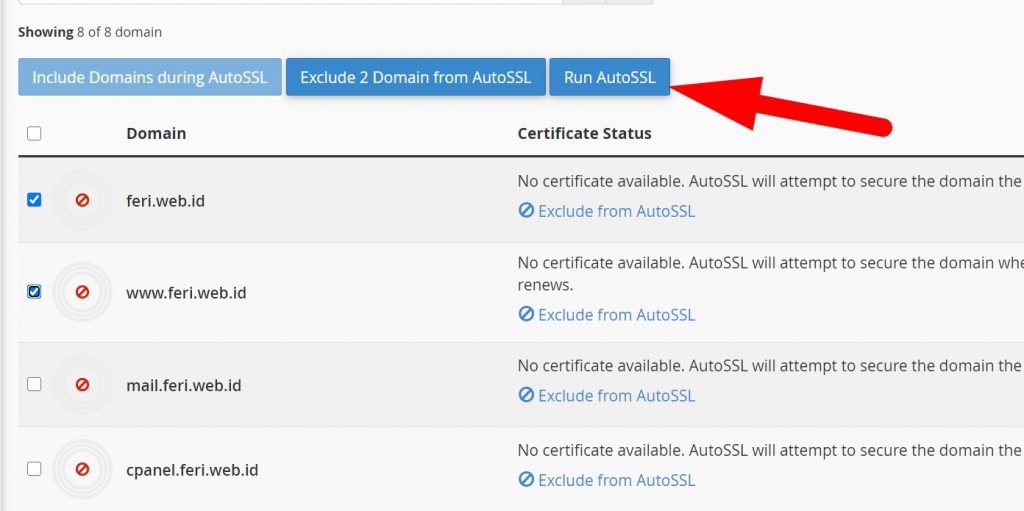
Return to the SSL Status page. Check the boxes for your primary domain and its www variant (additional subdomains are optional). Click Run AutoSSL.
The installation process typically takes a few minutes, up to about 30 minutes. You can close this page and check back later.
Once SSL is installed, configure your website to redirect to HTTPS so all visitors access it over a secure connection.
If you run into any issues, contact us via a Support Ticket.