Guide to installing WordPress on Digitalku hosting using the Softaculous Auto Installer in cPanel — fast and easy, no manual setup required.
WordPress is the world's most widely used CMS. It's easy to use and backed by a massive community with thousands of plugins and themes. Digitalku includes Softaculous Auto Installer in cPanel so you can install WordPress in minutes without any manual setup.
Installation Steps
Step 1 — Log In to cPanel
Log in to your hosting cPanel. See the how to log in to cPanel guide if needed.
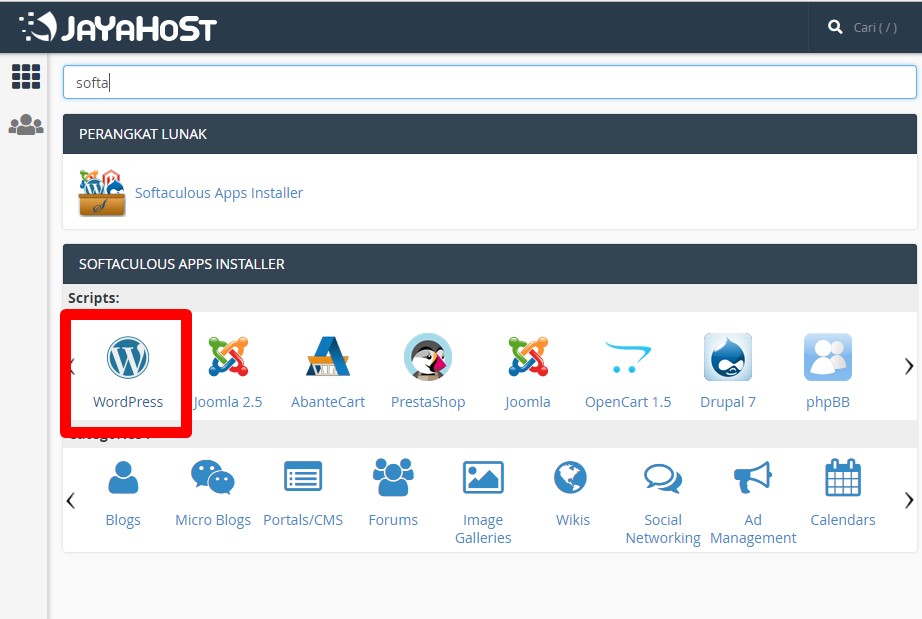
Step 2 — Open WordPress in Softaculous
Find Softaculous Apps Installer in cPanel, then click WordPress.
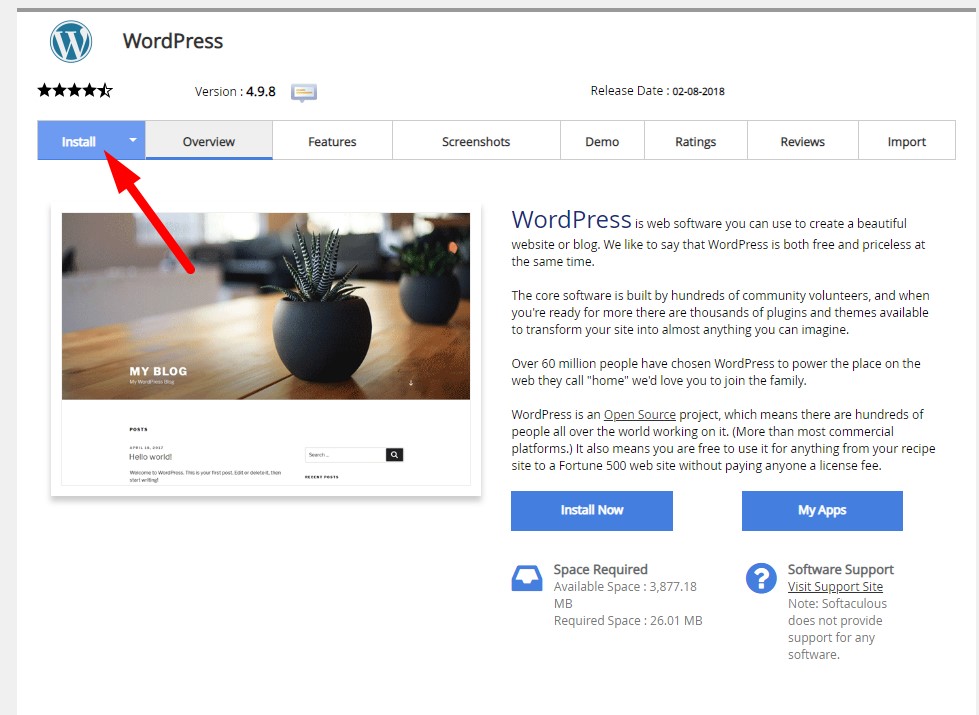
Step 3 — Click Install
You'll see an overview of WordPress features and the available version. Click Install to proceed.
Step 4 — Configure the Installation
Fill in the configuration form:
- Choose Protocol — select
https://if SSL is active, otherwisehttp:// - In Directory — leave empty to install at your root domain; enter a folder name to install in a subfolder
- Site Settings — enter your site name and description
- Admin Username & Password — the credentials you'll use to log in to the WordPress dashboard

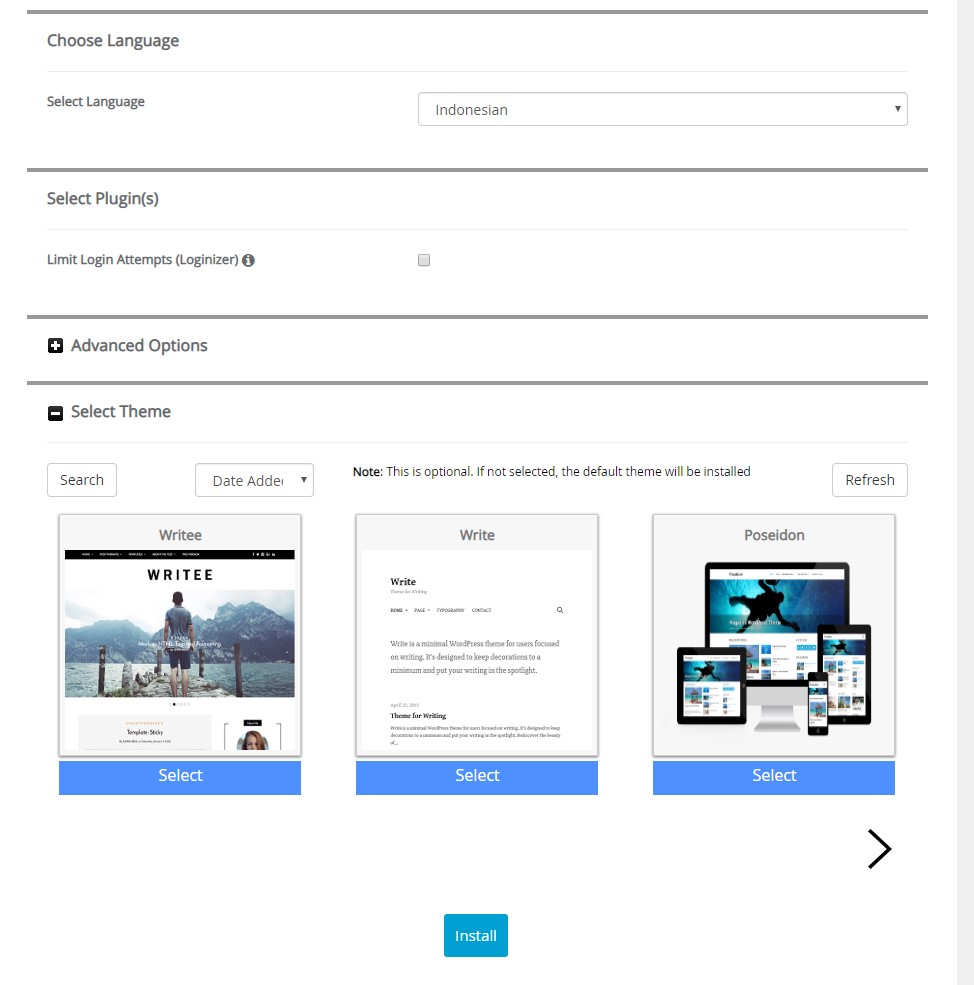
Step 5 — Choose Language and Theme
Select your preferred language (e.g. English) and a starter theme. The theme can be changed any time after installation.
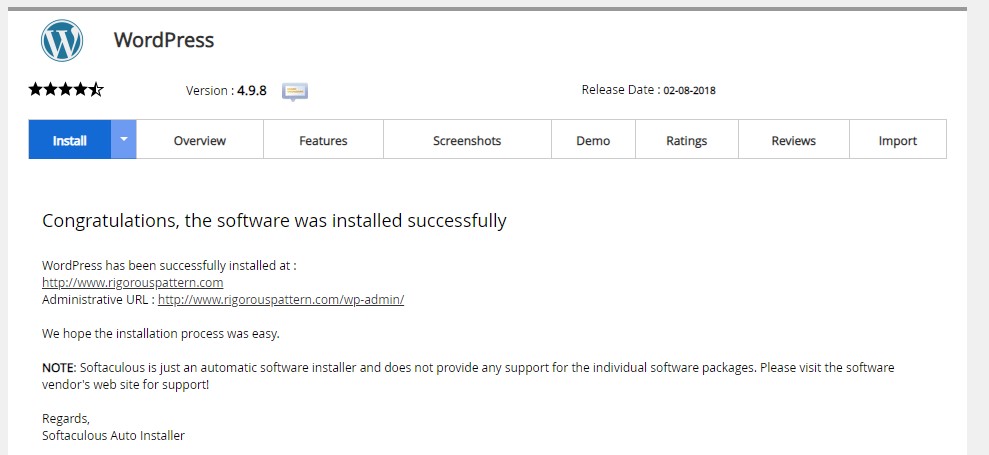
Step 6 — Done!
Installation is complete. Access your WordPress dashboard at:
https://yourdomain.com/wp-admin